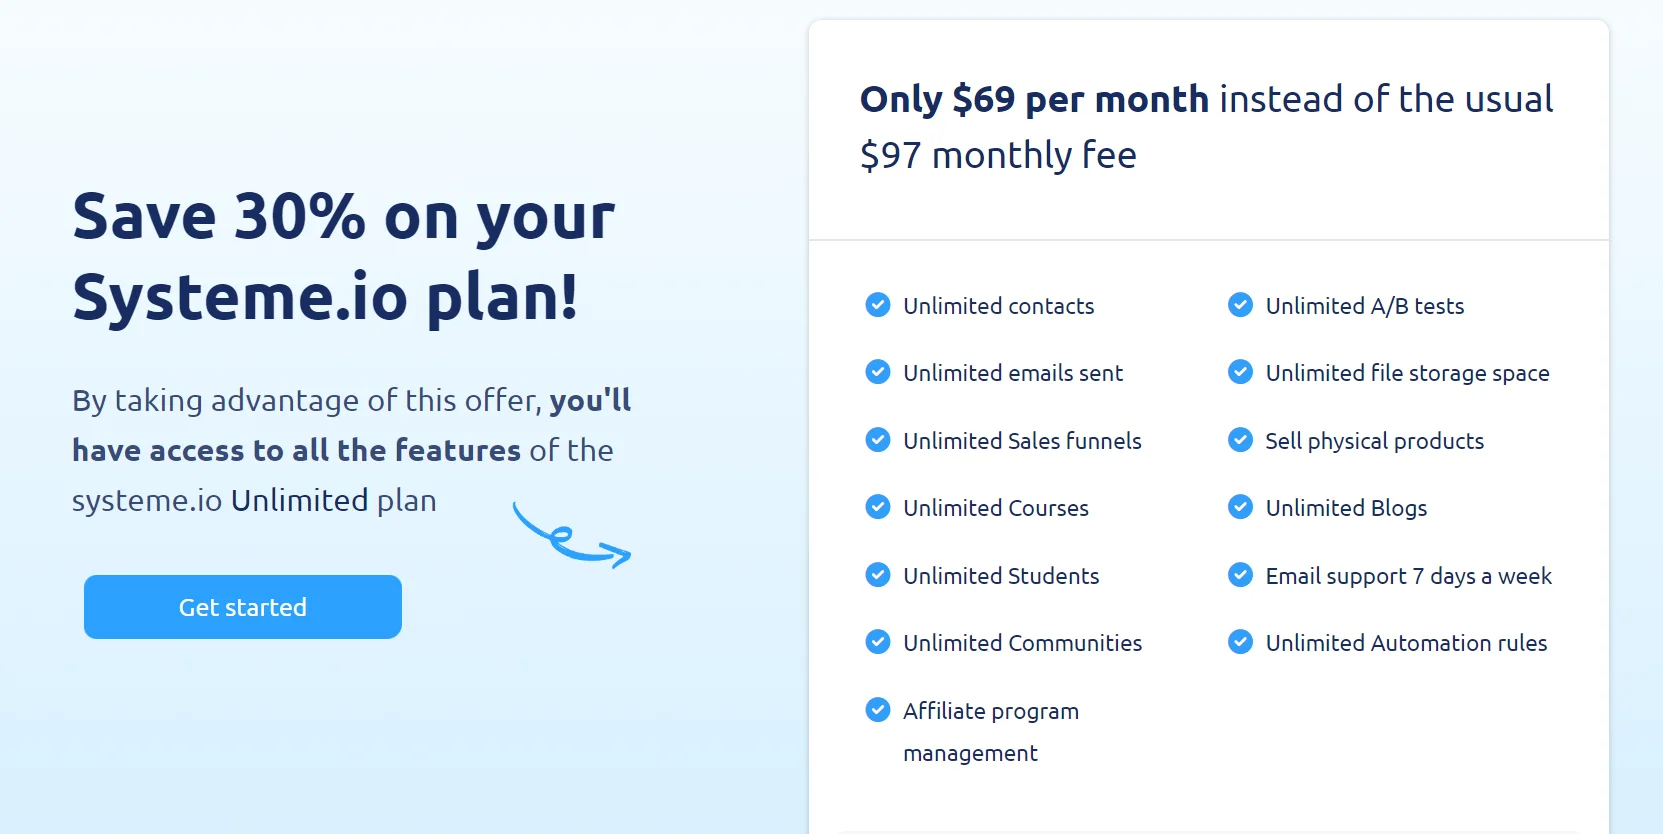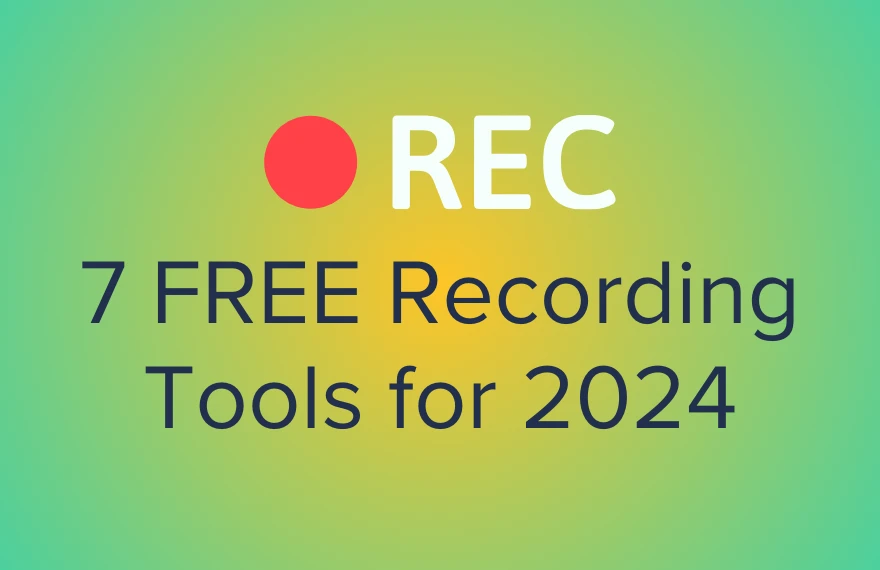

Let’s skip the fluff. You’re here for the free screen recording tools that won’t let you down when you’re mid-way through a tutorial.
This isn’t about fancy terms or overwhelming you with tech jargon. It’s about what works, what’s straightforward, and what you can use without pulling your hair out.
Are you a seasoned pro looking to expand your toolkit for video marketing or a newbie trying screen recording for the first time? We’ve brought you a straight-shooting list of the top seven screen recorders that are robust, reliable, and most importantly, free.
Let’s dive into the meat of it—how to do screen recording for tutorials, what such tools are, and why one of them could be the workhorse you didn’t know you needed for creating videos that stand out.
Free tools for creating screen recordings for tutorials
Choosing the right screen recorder software is essential for those looking to capture their screen activities. We have selected seven free screen capture software programs that allow you to record a screen on a Mac or PC.
1) Screen Capture

Screen Capture is a free screen recorder designed for quick and easy capture online. It allows users to capture their screen without downloading any software, making it accessible directly from a web browser.
The tool is capable of recording screen activities, webcam footage, plus system and microphone audio simultaneously, catering to a variety of tutorial and presentation needs.
Pros:
- Sleek interface
- Unlimited recording time
- Supports tab, window, or full-screen recording
Cons:
- No advanced tools
- No editing features
2) ScreenPal

ScreenPal is another cloud-based recording tool that offers a balance between functionality and ease of use. It provides users with the ability to efficiently record, edit, and share their videos.
The tool stands out for its integrated video editing tools, which allow for trimming, annotations, and text overlays without the need for additional software.
Pros:
- Customizable recording area
- Drawing on screen
- Direct upload to YouTube
Cons:
- Free version limits recording time and includes watermarks
3) Panopto Express

Panopto Express is free screen capture software designed for educators and professionals looking to create video content. It offers an opportunity to separately capture audio, video, and screen recording for tutorials, webinars, or else.
Although it doesn’t have advanced features, you can still customize the video quality, add blur or own background, and enable smart camera for one person or group presentations.
Pros:
- Uncluttered interface
- Easy to use for beginners
- Unlimited recording time
Cons:
- No options for editing
- Requires a sign-up to save recordings
4) FlashBack Express

FlashBack Express is free screen recording software for Windows, offering flexible recording options and high-quality output. Users can record their entire screen or select specific areas to capture, with the option to add audio from multiple sources.
The tool also offers basic editing features like trimming, text overlays, and annotations, making it a great all-in-one solution for creating tutorials.
Pros:
- User-friendly
- Built-in trimming tool
- No watermarks
Cons:
- Only available for Windows users
- Few free tools compared to the paid version
5) Clipchamp

Mostly known for video editing capabilities, Clipchamp also has easy-to-use video recording software. Users can capture their Windows or Mac screen with or without sound, and add webcam footage if needed.
It also has an interesting speaker coach feature, which provides tips for pacing, tone, and clarity of speech to improve the quality of your recordings.
Pros:
- Unlimited number of recordings
- Watermark-free
- Has an option to add subtitles
Cons:
- Requires signing in to start recording
- Limits recording to 30-minute sessions
6) CamStudio

CamStudio is an open-source desktop recording app that captures screen and audio activity on your Windows PC, offering basic features like video compression and customizable cursor effects. It’s lightweight and tailored for users looking for a simple, no-frills recording solution.
Pros:
- Open-source and free
- Supports adding captions
- Lossless compression
Cons:
- Outdated interface
- No advanced recording options
7) Online Screen Recorder

This browser screen recorder gives users a straightforward solution for capturing screen activities. It’s secure and provides unlimited recording time. Online Screen Recorder doesn’t come with anything fancy, but it does its job well.
Pros:
- Intuitive and fast
- No watermark or time limits
- Various recording modes
Cons:
- No features or customization apart from recording
- Only saves in MP4 format
How to create a video tutorial using a screen recorder
a) Preparing for recording
- Close unnecessary programs or windows that may appear on your screen during the recording. This will prevent any irrelevant information from being captured in the video and avoid distractions.
- Organize icons and files into folders or completely clear your desktop. This will ensure a clean and clutter-free background for your video, making it more professional and easier to follow
- If you record a computer screen with audio, test your microphone beforehand and see if it’s working properly. You can do this by recording a short audio clip and playing it back or using system settings.
2) Recording your tutorial
- Open your video tutorial software and adjust any necessary settings like video and audio quality, keyboard shortcuts, etc.
- Select a specific area of your screen to capture. Click on the record button or use the designated hotkey to start the recording.
- Narrate as you go and explain each step clearly. If you need to take a break, pause or stop the recording session.
- Once you’ve completed the tutorial, save the video file to your desired location.
3) Editing and enhancing your video
- Delete unwanted sections if your screen recorder has basic editing tools to trim and cut video clips. Use free video editing software instead if it doesn’t.
- Didn’t include audio during the recording? Add music, sound effects, or voiceover during the editing process.
- Some screen recorders allow you to add annotations, shapes, or highlights to specific areas of your video. Use these tools to draw attention to important parts of your video.
Conclusion
Having a reliable and user-friendly screen recorder is essential for creating high-quality video tutorials. Whether you’re a teacher, trainer, or content creator, one of the above options can help you record and share your knowledge. With some preparation and simple editing, you can easily create engaging and informative videos that will benefit your audience.